In dental surgery, we use specialized threads called sutures to stitch gum tissue back together after procedures like tooth extractions or implants. You can think of them as a dentist's way of carefully guiding your gums to heal, making sure everything stays precisely where it should. They are absolutely critical for protecting the surgical site and paving the way for a smooth, successful recovery.
The Role of Sutures in Modern Dentistry
Imagine a master tailor meticulously mending a delicate piece of fabric. That's a great way to understand what a dental surgeon does with sutures in dentistry. These aren't just simple "stitches"; they are a fundamental tool for orchestrating precise healing in the sensitive environment of your mouth. Suturing is a refined skill that ensures the best possible outcome after any surgical procedure.
The main job of a suture is to bring flaps of soft tissue together and hold them securely in place. This careful alignment is essential for a few key reasons:
- Protecting the Surgical Site: Sutures form a protective barrier, shielding the underlying bone and the vital blood clot from food particles and bacteria.
- Controlling Bleeding: By closing the wound, sutures apply gentle but firm pressure that helps stop bleeding and encourages hemostasis (the process of stopping blood flow).
- Stabilizing the Blood Clot: A stable blood clot is the foundation of good healing. Sutures keep it from getting dislodged, preventing painful complications like a dry socket.
- Reducing Post-operative Discomfort: When placed correctly, sutures can significantly minimize swelling and pain, making your recovery much more comfortable.
When Are Sutures Necessary?
Sutures are an indispensable part of many common dental procedures, especially those that involve an incision or the intentional movement of gum tissue. You'll almost always see them used after:
- Tooth Extractions: Especially for impacted wisdom teeth or complex removals where a gum flap was needed for access.
- Dental Implant Placement: To close the gum tissue over the new implant, protecting it during the crucial initial healing phase.
- Periodontal (Gum) Surgery: To reposition gum tissue after treating advanced gum disease or performing gum grafts.
- Biopsies: To neatly close the small site where a tissue sample was taken for examination.
The practice of closing wounds is ancient. The earliest known evidence actually dates back to 1600 BCE in Egypt, where doctors used linen strips as sutures to pull wound edges together. These foundational techniques were refined over centuries, leading to the advanced materials and methods we rely on today.
This long history highlights just how important proper wound closure has always been in medicine. In a modern dental practice, this skillful work is supported by meticulous record-keeping. Many offices now use advanced tools to improve efficiency, like medical voice recognition software that allows for hands-free documentation of surgical details.
Ultimately, the careful placement of sutures by your dentist is one of the most important steps in laying the groundwork for your successful healing.
When it comes to sutures in dentistry, they are definitely not a one-size-fits-all solution. Dentists have a highly specialized toolkit, and the choice of suture material is one of the most critical decisions we make during a procedure. The entire world of dental sutures can be broken down into two main families: absorbable and non-absorbable.
You can think of it like choosing materials for a construction project. Sometimes, you need temporary scaffolding that gets taken down once the main structure is stable. Other times, you need supports that are designed to become a permanent, integrated part of the final build. This is the perfect analogy for the core difference between these two types of sutures.
This image breaks down the two main categories of dental sutures.
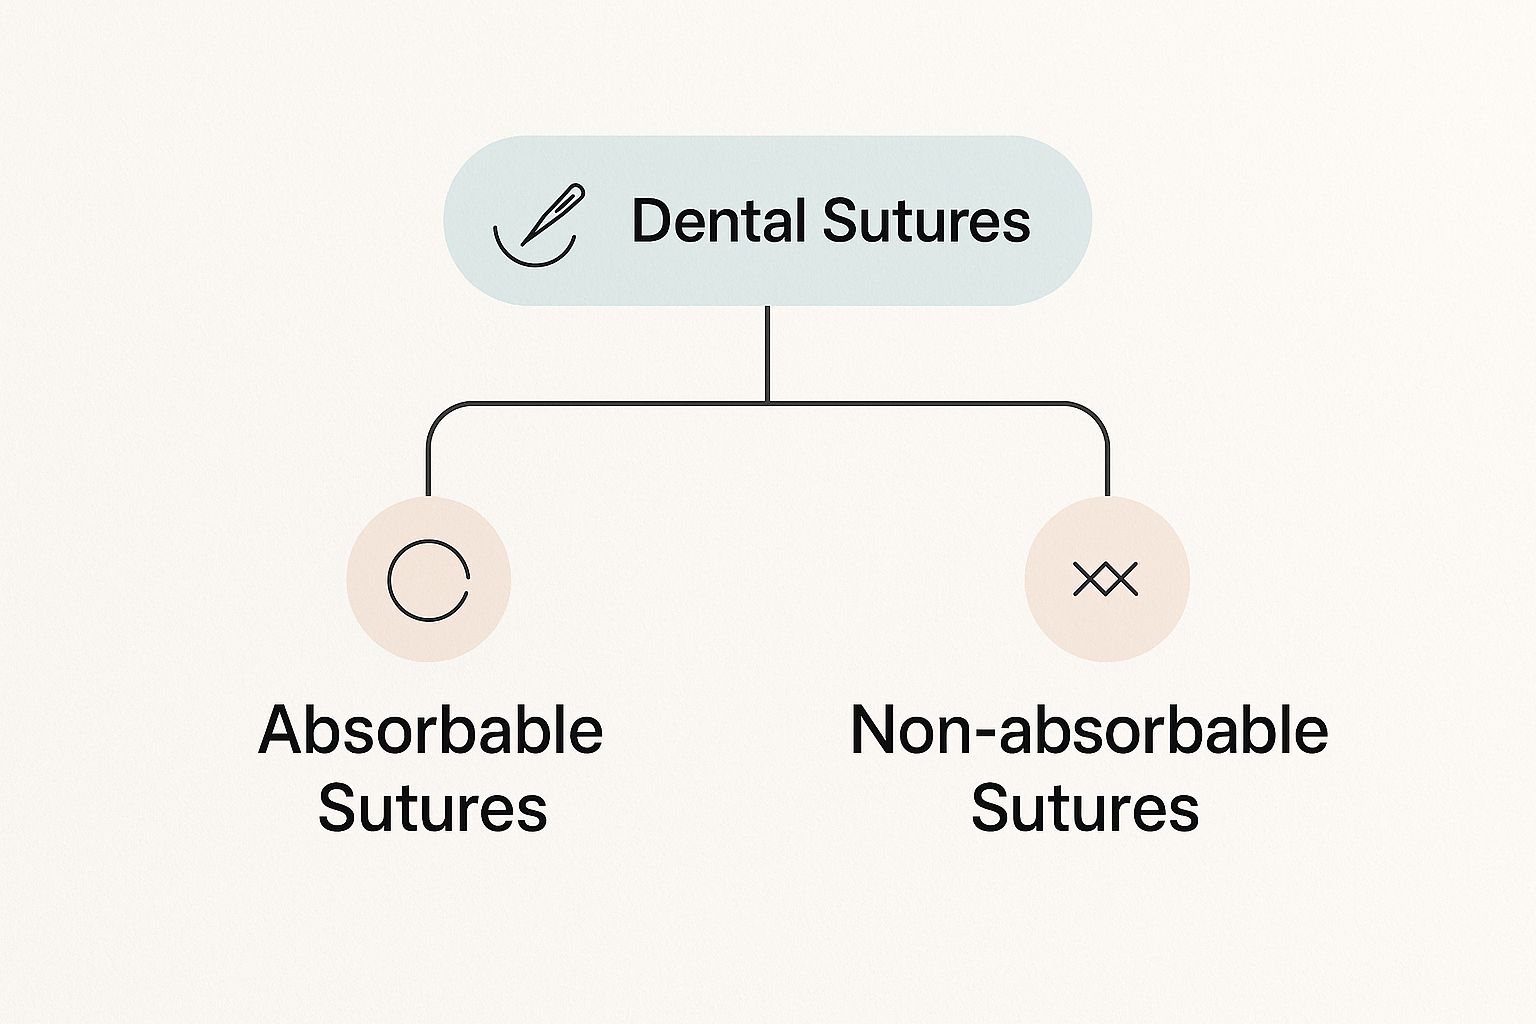
As you can see, every suture falls into one of these two camps, and that fundamental difference guides a dentist’s selection process for every single procedure.
Absorbable Sutures: The Self-Dissolving Scaffolding
Absorbable sutures are essentially the "set it and forget it" option in wound closure. They're crafted from materials that your body can naturally break down and absorb over time through simple enzymatic reactions or hydrolysis. This offers a huge advantage for both the patient and the dentist.
The biggest benefit is pure convenience—it eliminates the need for a follow-up appointment just to get stitches out. This makes them the ideal choice for closing deeper tissue layers or for patients who might find it difficult to return to the office.
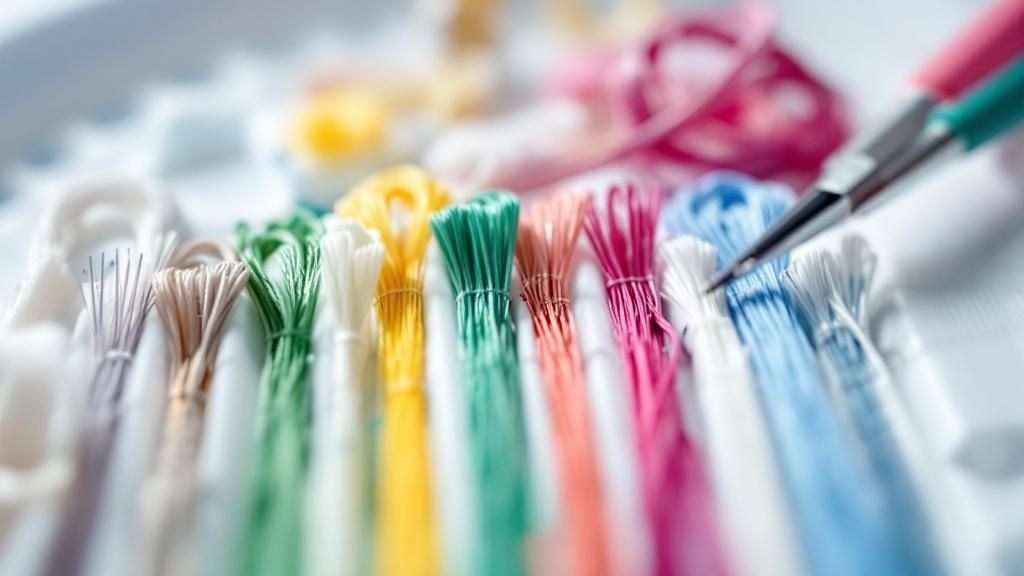
There are several types of absorbable sutures, each with its own timeline for dissolving:
- Gut Sutures: Derived from the purified intestines of sheep or cattle, these natural sutures are typically broken down by the body within 7 to 10 days.
- Chromic Gut: This is simply a gut suture that has been treated with chromium salts. The treatment strengthens it and slows down the absorption process, so it generally lasts for about 10 to 14 days, providing support for a little longer.
- Synthetic Polymers (like Vicryl): Made from man-made materials, these are incredibly predictable. They often provide stable wound support for 2 to 3 weeks before fully dissolving.
The choice of material is directly linked to how long we expect the tissue to take to heal. A dentist selects a suture that will hold its strength just long enough for the wound to gain its own footing, and then conveniently disappear on its own.
This makes absorbable sutures a go-to for many routine procedures, like most wisdom tooth extractions, where the gum tissue heals relatively quickly and having to remove stitches would be an unnecessary hassle.
Non-Absorbable Sutures: The Temporary Support Wires
On the other hand, non-absorbable sutures act like sturdy, temporary support wires. They are made from materials that the body can't break down. Because they don’t dissolve, they have to be manually removed by your dentist once the wound has healed enough, which is usually 7 to 14 days after the procedure.
While this does require a second visit, these sutures offer a critical advantage: superior tensile strength. They are exceptionally strong and maintain their integrity over time without degrading. This makes them the perfect choice for situations where the tissue is under a lot of tension or when prolonged, reliable wound support is absolutely essential for a successful outcome.
Common materials for non-absorbable sutures include:
- Silk: A natural, braided material known for its fantastic handling and knot security.
- Nylon: A strong, synthetic material that causes very little tissue reaction.
- Polypropylene: Another synthetic option, popular for its smooth surface that helps prevent bacterial buildup along the stitch.
A dentist might choose a non-absorbable suture to secure a gum graft or to close an incision over a large dental implant. In these delicate cases, the suture's predictability and strength are far more important than the convenience of it dissolving. The need for removal is a small, worthwhile trade-off to ensure the tissues heal perfectly without being pulled apart.
Absorbable vs. Non-Absorbable Dental Sutures
To make the differences even clearer, here's a direct comparison of the two main types of dental sutures. This table highlights their key features, common materials, and typical uses in the dental office.
| Feature | Absorbable Sutures | Non-Absorbable Sutures |
|---|---|---|
| Primary Characteristic | Break down and dissolve in the body over time. | Do not dissolve; must be manually removed. |
| Follow-up Appointment | No removal appointment is needed. | A follow-up visit for removal is required. |
| Tensile Strength | Lower initial strength; strength decreases over time. | High initial strength that is maintained over time. |
| Common Materials | Gut, Chromic Gut, Vicryl (Polyglycolic acid) | Silk, Nylon, Polypropylene |
| Ideal For | Routine extractions, deep tissue closure, pediatrics. | Gum grafts, dental implants, high-tension areas. |
| Key Advantage | Convenience and no need for removal. | Strength, reliability, and predictable support. |
Ultimately, deciding between absorbable and non-absorbable sutures is a critical part of the surgical planning process. The choice is always tailored to your specific clinical needs, the location of the wound, and the healing requirements of the tissue involved. This ensures the best possible outcome for your procedure.
Exploring Suture Materials and Needle Designs
Once we've decided between an absorbable and a non-absorbable suture, the next choice comes down to how the thread itself is built. This is where things get really interesting. We're looking at two main types of construction: monofilament and multifilament.
Think of it this way: a monofilament suture is like a single, smooth strand of fishing line. It’s incredibly sleek and glides through delicate gum tissue with almost no friction. This makes it a fantastic choice for minimizing trauma during placement.
On the other hand, a multifilament suture is more like a tiny, braided rope. Multiple smaller strands are woven together, which gives it amazing strength and flexibility. This texture makes it a dream for us to handle and tie knots that stay put.
These physical differences aren't just for show; they have a real impact on how sutures perform in the mouth, especially when it comes to bacteria.
Smooth Single Strands Versus Braided Ropes
Choosing between monofilament and multifilament often involves a trade-off. We have to balance how easy the suture is to handle against how well it resists bacteria. Each has its place in modern dentistry.
Monofilament Sutures (The Fishing Line):
- Keeps Bacteria Out: Their ultra-smooth surface has nowhere for bacteria to hide. This makes them a go-to choice for sites where we’re worried about infection.
- Gentle on Tissue: They pass cleanly through tissue, which is perfect for delicate work like cosmetic gum procedures.
- The Catch: That slickness can make knots a bit slippery. We often need to add a few extra throws to make sure the knot is completely secure.
Multifilament Sutures (The Braided Rope):
- Incredible Handling: The braided texture gives them a great feel and grip, making it easier to tie predictable, secure knots. It just feels right in your hands.
- Serious Strength: The woven design provides fantastic tensile strength, which is exactly what you want for holding wound edges together under tension.
- The Downside: Those tiny spaces in the braid can potentially harbor bacteria. It's a phenomenon called the "wicking effect," where fluid and bacteria can be drawn into the thread.
This concern over infection completely changed the game in medicine. Back in 1867, a pioneer named Joseph Lister started using carbolic acid to create sterile surgical conditions, which drastically cut down on infections from sutures. By 1887, Johnson & Johnson began mass-producing sterile sutures, a move that standardized safety and made reliable wound closure a reality for dentists and surgeons everywhere. You can learn more about this incredible history of surgical progress and how it shaped the care you receive today.
The Engineering of the Dental Suture Needle
Every suture comes with a needle, and it’s a tiny marvel of engineering. Its sole purpose is to guide the thread through tissue with pinpoint accuracy and as little trauma as possible. Just like the thread, the needle is carefully selected for the specific job at hand.
In dentistry, you’ll almost always see curved needles, most commonly in a 3/8 circle or 1/2 circle shape. This curve isn't random—it allows us to pass the needle through tissue with a natural rotation of the wrist, which is essential when you're working in the tight confines of the mouth.
The point of the needle is just as critical. They generally fall into two categories:
- Cutting Needles: These have a sharp, triangular tip designed to cleanly slice through tough, fibrous tissues like the gums or the roof of the mouth. They make that initial pass much easier.
- Tapered Needles: These needles have a round body that tapers to a sharp point but without cutting edges. They are designed to pierce and spread tissue fibers apart instead of cutting them, making them much gentler and ideal for more delicate areas.
Choosing the right needle is just as important as choosing the right thread. A well-matched needle and thread combo ensures we can place the suture exactly where it needs to be, setting the stage for smooth, uneventful healing.
How Dentists Choose and Place Sutures
Placing dental sutures is equal parts art and science. It’s a delicate skill that demands a deep understanding of oral anatomy and the steady hand of a surgeon. Your dentist doesn’t just grab any needle and thread off the shelf; the entire process is a series of careful decisions aimed at giving your body the best shot at healing quickly and correctly.
Think of it like a master tailor selecting the right materials for a custom garment. You wouldn’t use a coarse, heavy thread on fine silk, nor would a delicate one hold up on rugged denim. In much the same way, a dentist carefully weighs several factors before picking from the many types of sutures in dentistry.
The Suture Selection Checklist
Every stitch starts with a quick mental checklist. The dentist has to evaluate the unique needs of the surgical site to make sure the suture they choose has the perfect balance of strength, flexibility, and longevity for a smooth recovery.
Key factors include:
- Location in the Mouth: Is the wound in a high-motion area like your cheek, or a more stable spot like the roof of your mouth? The answer dictates how much tension the stitches will face.
- Tissue Type: Suturing tough, fibrous gum tissue requires a different approach than closing a delicate incision in the soft lining of your mouth.
- Wound Tension: How much force is pulling the wound edges apart? A high-tension area needs a stronger, non-absorbable suture to prevent the site from reopening.
- Healing Timeframe: Does the tissue need support for just a few days or for several weeks? This is the main reason a dentist chooses between absorbable and non-absorbable materials.
This detailed selection process has been refined over decades. Major leaps forward in the mid-20th century were especially crucial. The invention of eyeless needled sutures in 1949—where the thread is fused directly to the needle—drastically reduced tissue trauma during placement. Then, in the 1960s and 70s, the development of synthetic absorbable materials and sterilization via irradiation made sutures in dentistry far safer, more reliable, and more comfortable for patients. You can learn more about the history of these suture innovations on JNJ.com and see how they transformed surgical outcomes.
Common Suturing Techniques Explained
Once the perfect suture is chosen, the next step is placing it correctly. While there are many complex techniques for advanced surgeries, most dental procedures rely on a few fundamental methods. Each technique serves a specific purpose, whether it’s quickly closing a long incision or allowing for precise adjustments as you heal.
1. Simple Interrupted Stitch
This is the workhorse of dental suturing—the most common and versatile technique. Imagine tying a series of individual, separate knots. The dentist passes the needle through both sides of the gum flap, ties a secure knot, and then snips the thread before moving to the next stitch.
- Why it's used: It gives the dentist excellent control over wound tension. Better yet, if one stitch happens to fail, the others stay put, keeping the wound secure. It also makes it easy to remove just one or two stitches if a specific area needs to drain.
2. Continuous Stitch (Running Stitch)
This technique is a lot like sewing a hem. The dentist starts with a knot at one end of the incision and then weaves a series of connected stitches along the entire length of the wound, tying it off with a single knot at the very end.
- Why it's used: It's much faster to place than interrupted stitches, which makes it perfect for closing long, straight incisions where tension is nice and even. It also creates an incredibly effective seal along the wound line.
A dentist’s choice of technique is never random. It’s a strategic decision based on the wound's specific needs. The goal is always the same: to bring the tissue edges together gently and securely, creating the perfect environment for your body's natural healing process to kick in.
Caring For Your Sutures After Surgery
The success of your dental surgery doesn't just end when you walk out of the office. What you do at home is just as critical. Proper post-operative care is your playbook for a smooth, comfortable recovery, and following your dentist's instructions for your sutures in dentistry is key to protecting the surgical site and heading off any complications.
Think of the sutured area as a delicate construction zone. Your main job is to keep it clean and, most importantly, undisturbed. This doesn't mean aggressive cleaning—quite the opposite, in fact. For the first 24 hours, you'll want to avoid rinsing your mouth entirely. This quiet period is crucial for allowing the protective blood clot to form and stabilize.
After that initial day has passed, you can start gentle rinsing. Your dentist will likely suggest a simple warm salt water solution (1/2 teaspoon of salt in a glass of warm water) or a prescribed antimicrobial rinse. The trick is to be gentle. Let the solution flow over the area, then just tilt your head and let the water fall out into the sink. Avoid forceful spitting, as the pressure can easily dislodge that all-important clot.
The Dos and Don'ts of Suture Care
Navigating the first week after surgery can feel a little tricky, but a few simple guidelines will help protect your investment in your oral health. Knowing what to do—and just as importantly, what not to do—will set you firmly on the path to successful healing. Following the principles of effective post-discharge wound care is a huge part of ensuring a smooth recovery process.
The "Do" List:
- Eat Soft Foods: For a few days, stick to a diet of soft, nutritious foods. Think yogurt, mashed potatoes, smoothies, and lukewarm soups. This minimizes chewing and keeps hard food particles away from your stitches.
- Stay Hydrated: Drink plenty of water. A well-hydrated body is a healing body. It also helps prevent dry mouth, which can slow down your recovery.
- Rest Up: Give your body the time it needs to heal. Ease up on physical activity for the first couple of days to keep your blood pressure stable and minimize any bleeding.
The "Don't" List:
- Do Not Brush the Site: Keep brushing and flossing your other teeth, but give the surgical area a wide berth for several days. Let the gentle rinse do the cleaning there for now.
- Do Not Poke or Prod: It's tempting, but resist the urge to explore the area with your tongue or fingers. This can irritate the tissue, introduce bacteria, and loosen the stitches.
- Do Not Smoke or Drink Through a Straw: The suction from both of these actions can easily pull the blood clot out of the socket. This can lead to a very painful condition called a dry socket, which you definitely want to avoid.
A common worry for patients is what to do if a suture feels loose or comes out a bit early. While it's often not an emergency, especially as the wound heals, you should always give your dental office a call. Never, ever try to cut or remove a suture yourself.
Understanding Suture Removal
If your dentist used non-absorbable sutures, you'll need to pop back in for a quick follow-up visit, usually 7 to 14 days after your procedure. Many patients feel a little anxious about this appointment, but I promise you, the removal process is incredibly quick and painless.
Your dentist or a surgical assistant will start by gently cleaning the area. Then, using small, sterile instruments, they'll lift the suture slightly, make a tiny snip, and gently guide the thread out. Most people report feeling just a slight tugging sensation, if they feel anything at all. The whole process for several stitches often takes just a minute or two.
Once they're out, your gums will continue to heal and remodel, putting the finishing touches on your successful surgery.
Common Questions About Dental Sutures
Even after you understand why we use sutures in dentistry, it’s completely normal to have a few more questions. Let's be honest, the thought of having stitches in your mouth can be a little intimidating. This section is all about tackling those common concerns head-on, giving you clear, straightforward answers to help you feel prepared and at ease.
Knowing what to expect is the best way to reduce any anxiety about your procedure and recovery. We'll get right to the point on everything from pain to aftercare, so you have all the information you need for a smooth, comfortable healing process.
Are Dental Sutures Painful?
This is usually the first thing patients ask, and the answer is a reassuring one. The sutures are placed right after your dental surgery, while the area is still completely numb from the local anesthetic. You won't feel the stitching at all.
Once the numbness wears off, you might feel some soreness or tightness around the surgical site. This is a totally normal part of healing and is usually managed easily with the pain relievers your dentist recommends.
And what about getting them out? If you have non-absorbable sutures, the removal process is incredibly fast and typically painless. Most people just report feeling a slight pull or a tickling sensation as the thread is gently snipped and guided out. It’s over in a minute or two.
What Should I Do If a Suture Comes Out Early?
It can be a bit startling to see a stitch come loose or fall out ahead of schedule, but the most important thing is not to panic. Often, especially a few days post-surgery, it just means the tissue has healed enough on its own that the suture's job is done.
That said, you should always take a moment to check the situation and get in touch with your dentist.
- First, take a look at the area. Is there any active bleeding? Does the wound look like it has opened up? Has your pain increased?
- Next, call your dentist's office. Even if everything appears fine, this is always the best move. Just explain what happened, and they’ll give you specific instructions.
- Follow their advice. They might just reassure you that it’s nothing to worry about, or they might ask you to pop in for a quick check to make sure everything is healing as it should.
Under no circumstances should you ever try to fix, re-insert, or cut a remaining suture yourself. This can introduce bacteria, damage the delicate healing tissue, and lead to serious complications. Always leave it to the professionals.
How Long Do Absorbable Sutures Take to Dissolve?
The timeline for absorbable sutures can vary quite a bit because they are designed to match different healing speeds. Your dentist carefully chooses a material that will provide support for the exact amount of time your specific wound needs.
- Gut Sutures: As a natural material, these dissolve the fastest, typically breaking down within 7 to 10 days.
- Chromic Gut: This is a gut suture that has been treated to make it a bit stronger. It usually lasts for about 10 to 14 days.
- Synthetic Sutures (like Vicryl): These are engineered to be very predictable and generally hold their strength for 2 to 3 weeks before fully dissolving.
Your dentist will let you know which material they used and what you can expect. It's perfectly normal to notice small pieces of the suture coming out as they dissolve—this is actually a good sign! It means they're doing their job and your healing is on track. Don't worry if you find a small piece of thread on your tongue; just remove it and carry on.
Can I Brush My Teeth with Sutures in My Mouth?
Yes, you can—and you absolutely should! Maintaining your oral hygiene is critical for preventing infection and ensuring your mouth heals properly. You'll just need to modify your routine and be extra gentle.
For the first 24-48 hours, your dentist will likely instruct you to avoid the surgical site completely. Your best friend during this initial period is a gentle rinse. After a couple of days, you can start carefully cleaning around the area.
Here’s the safe way to do it:
- Brush Other Teeth Normally: Go ahead and brush and floss all the teeth that weren't part of the surgery just like you always do.
- Be Gentle Near the Site: Use a very soft-bristled toothbrush to gently clean the teeth next to the surgical area. Be careful to avoid making direct contact with the gumline or the sutures.
- Use Your Prescribed Rinse: Your dentist will almost certainly provide a medicated antimicrobial mouth rinse. Use this exactly as directed. It’s designed to keep the sutured area clean without the need for brushing.
- Avoid Forceful Spitting: When you rinse, just let the water gently fall out of your mouth into the sink. Spitting forcefully can dislodge the crucial blood clot that helps your wound heal.
Following these simple guidelines for at-home care plays a huge role in a successful recovery. By working with your dental team, you can help make sure your healing is as quick and comfortable as possible.
At Beyond Dental Care, we believe that an informed patient is an empowered patient. Dr. Dariene Lazore and our entire team are dedicated to ensuring you feel comfortable and confident through every step of your treatment, from initial consultation to final recovery. If you're in Glendale, Peoria, or the surrounding communities and seeking exceptional, patient-focused dental care, we invite you to experience the difference.
Visit us to learn more about our comprehensive dental services at https://beyonddentalcare.com.