The moment your orthodontist finally removes your braces is a huge milestone. It’s exciting, for sure, but it’s also a really critical time for your oral health. Your first priority should be getting a professional cleaning to tackle any built-up plaque, followed by establishing a gentle but super-effective home care routine.
Think of this as the foundation for keeping that beautiful new smile looking its best for years to come.
Your First Steps After Braces Removal
After months or even years with brackets and wires, your teeth are going to feel incredibly smooth. But they’re also in a delicate state. The dental cement that held your brackets in place is gone, and the enamel underneath has been covered up for a long time. This is your chance to give your entire smile the deep clean it’s been waiting for.
Prioritize a Professional Cleaning
Honestly, the very first thing you should do after leaving the orthodontist’s office is call your dentist and schedule a professional cleaning. You did your best to clean around all that hardware, but it’s nearly impossible to reach every single nook and cranny.
This cleaning is non-negotiable for a few key reasons:
- Removing Stubborn Plaque and Tartar: A hygienist has the tools and skills to expertly remove any hardened plaque (tartar) that snuck in around the edges of your old brackets.
- Polishing Away Surface Stains: The cleaning and polishing will buff away minor surface stains, which helps even out your tooth color for a brighter look.
- Assessing Enamel Health: This appointment gives your dentist the first clear view of your enamel. They can check for any decalcification—those little white spots that are the earliest signs of cavities.
In fact, orthodontic research shows that the areas once covered by braces can be 30–50% more prone to decalcification if hygiene wasn't perfect. A professional cleaning is the smartest way to get ahead of this risk. You can find out more about why dentists so strongly recommend this immediate follow-up care for post-braces patients.
Expert Insight: I always tell my patients to think of this first cleaning as hitting the "reset" button for their oral health. It gets rid of any lingering effects from the braces and creates a perfectly clean slate. This makes your new home care routine more effective from the very first day.
Your Day-One Home Care Routine
On the day your braces come off, don't be surprised if your teeth and gums feel a bit sensitive. It’s completely normal. All that pressure is suddenly gone, and your gums might be slightly inflamed from the removal process itself.
For the first 24-48 hours, the goal is to be gentle. This isn't the day to celebrate with a bag of crunchy chips or hard candy. Instead, focus on a simple, soothing cleaning routine.
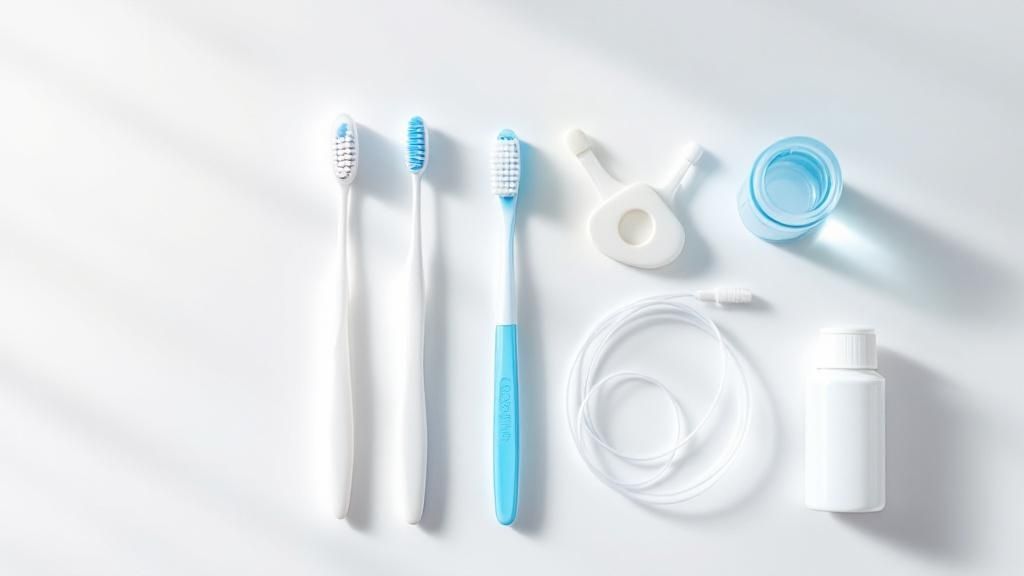
- Use a Soft-Bristled Brush: Your best friend right now is a brand new, soft-bristled toothbrush. Brush with gentle, circular motions, and pay extra attention to the gumline where plaque loves to hang out.
- Floss Carefully: Flossing without wires getting in the way will feel like a dream, but take it slow at first. Guide the floss gently between each tooth to avoid snapping it against your sensitive gums.
- Rinse with Lukewarm Water: Steer clear of very hot or icy cold water, as it can trigger sensitivity. A simple rinse with lukewarm water is perfect. If you use a mouthwash, make sure it’s a gentle, alcohol-free formula.
Your First Week Post-Braces Care Checklist
To help you get into a great routine right away, here’s a quick-reference checklist for that all-important first week. Sticking to this will set you up for long-term success.
| Day | Morning Routine | Evening Routine | Special Consideration |
|---|---|---|---|
| Day 1 | Gentle brush with soft-bristle brush. Rinse with lukewarm water. | Gentle brush & very careful flossing. Alcohol-free rinse. | Stick to soft foods. Avoid extreme temperatures. |
| Day 2-3 | Brush thoroughly, focusing on gumline. Floss normally. | Brush thoroughly. Floss every tooth. Consider fluoride rinse. | Gums may still be a little tender. Be mindful. |
| Day 4-5 | Full routine: Brush for 2 min. Floss. Rinse. | Full routine: Brush for 2 min. Floss. Rinse. | Start reintroducing firmer foods slowly. |
| Day 6-7 | Full routine. | Full routine. | Your new normal! Keep up the great work. |
This first week is all about cementing good habits. By the end of it, your new, braces-free cleaning routine should feel like second nature.
Mastering Your New Brushing and Flossing Routine
With your braces finally off, you have full access to your teeth for the first time in what feels like forever. This is the perfect moment to really level up your daily cleaning habits. The old techniques you used to painstakingly navigate around brackets and wires just won't cut it anymore. It's time for a fresh approach to keep your newly straightened smile healthy and bright for the long haul.
Learning how to clean your teeth after braces isn’t about relearning a skill from scratch, but more about refining it. Now, you can finally focus on the fundamentals with much greater precision.
The image below shows the best brushing technique to use while you still have braces, and the core principle is something you’ll carry forward now that they’re off.
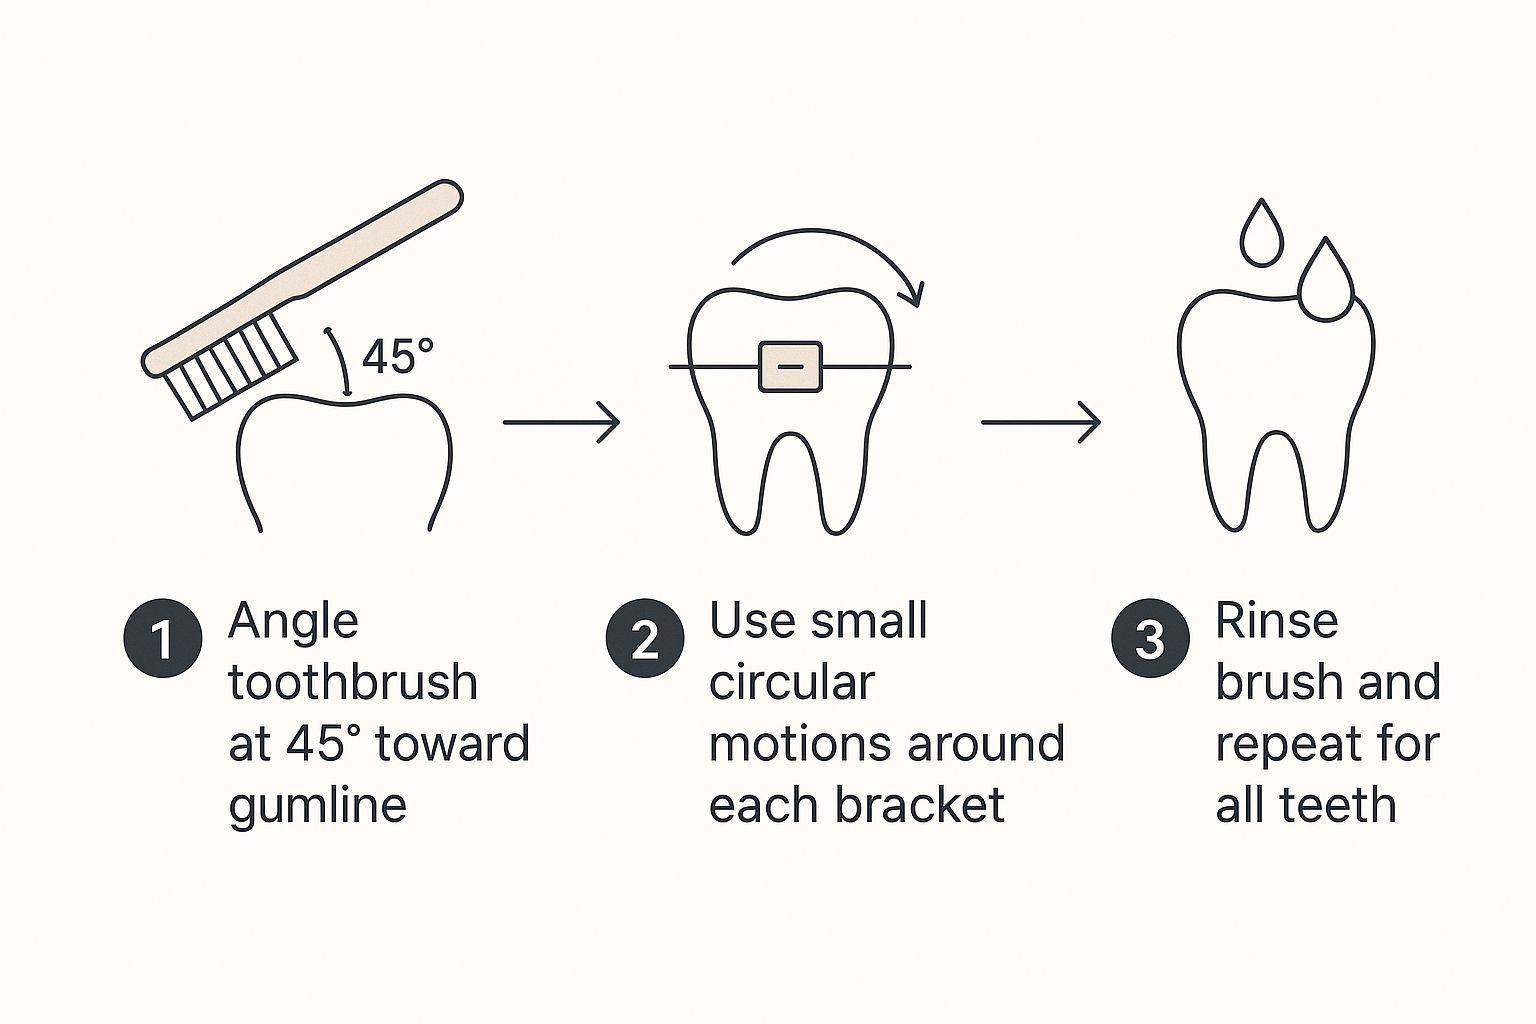
The key takeaway here is that 45-degree angle toward the gumline. Even without braces, this technique is absolutely essential for dislodging plaque where it loves to hide most.
Rethinking Your Brushing Technique
Your gums might be a little tender or puffy after the debonding appointment, which is totally normal. This makes your choice of toothbrush more important than ever. I always recommend my patients grab a soft-bristled toothbrush to avoid causing any irritation. Hard bristles can be surprisingly abrasive to sensitive gums and even your enamel.
When you brush, make a conscious effort to clean every single surface of each tooth—the front, the back, and the chewing surfaces. Use gentle, circular motions and pay special attention to the gumline, because that's where plaque accumulation is most common. The best part? With no brackets in the way, you can achieve a much more thorough clean than before.
A Pro Tip: Try brushing with your non-dominant hand every now and then. It sounds a little strange, but it forces you to slow down and be more mindful of your technique, helping you hit spots you might miss out of habit.
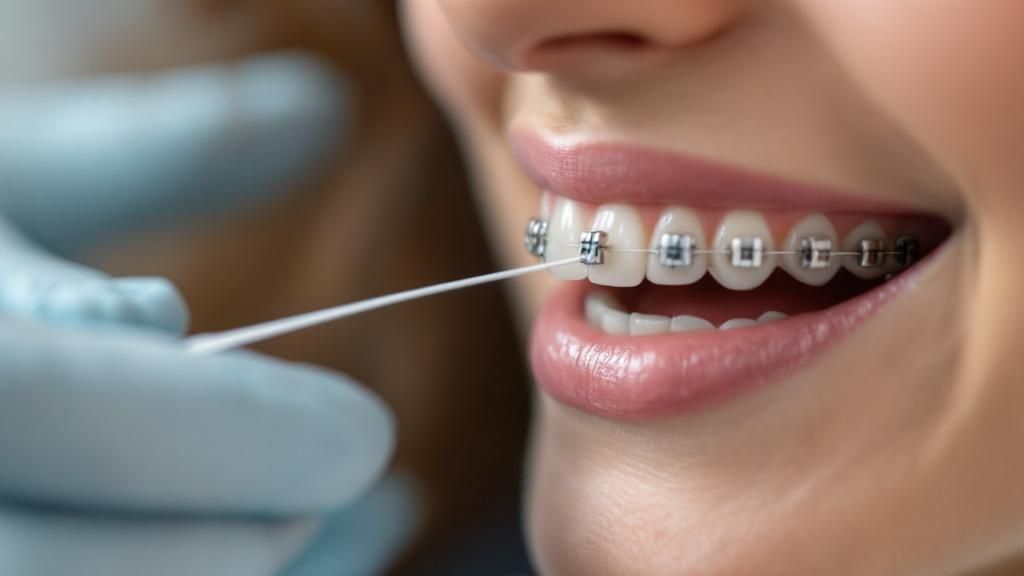
Choosing the Right Flossing Tools
Flossing without a maze of wires is a complete game-changer. The tight spaces between your newly aligned teeth can be a magnet for food particles and plaque. Flossing every day is your absolute best defense against cavities trying to form in these tricky spots.
While good old-fashioned string floss is incredibly effective, some other tools might make the job easier and, frankly, more enjoyable.
- Floss Threaders: If you have a permanent retainer bonded to the back of your teeth, these are non-negotiable. Floss threaders are your best friend for guiding floss underneath that wire.
- Interdental Brushes: These tiny "go-between" brushes are fantastic for cleaning around permanent retainers and in any slightly wider gaps between your teeth.
- Water Flossers: Also known as oral irrigators, these devices use a high-pressure stream of water to flush out debris and plaque. They are particularly great for anyone with sensitive gums.
Believe it or not, a proper oral hygiene routine can slash plaque accumulation by up to 60%, which dramatically reduces your risk of cavities and gum inflammation. The growing popularity of tools like water flossers really highlights this trend. In fact, sales in North America and Europe showed a 28% annual increase between 2020 and 2025 as more people adopt them for post-orthodontic care. You can discover more insights about post-braces oral care at Jersey City Dental Center.
A Simple Daily Routine for Success
Your new routine doesn’t need to be complicated to be effective—it just needs to be consistent. The goal is to build a habit that feels automatic, protecting that beautiful investment in your smile without you even having to think about it.
Here is a straightforward yet powerful routine to adopt:
- Brush Morning and Night: Make sure you brush for a full two minutes each time. Set a timer if you have to!
- Floss Once a Day: Flossing right before bed is ideal. It clears out any plaque and food debris that built up during the day.
- Rinse as Needed: Think about adding an antiseptic or fluoride mouthwash to your routine to help kill bacteria and strengthen your enamel.
By mastering these simple steps, you’re not just cleaning your teeth; you are actively protecting the gorgeous, straight smile you and your orthodontist worked so hard to achieve.
How to Manage Post-Braces Sensitivity
That first moment you run your tongue over your newly freed teeth is amazing, but it often comes with an unexpected sidekick: sensitivity. Don't worry, this is completely normal. For months or years, your teeth and gums were under constant pressure, and now they're adjusting to life without brackets and wires.
The good news is that this discomfort is temporary, and you can take some simple, effective steps to manage it. It's all about being gentle and giving your mouth the support it needs during this transitional phase.
Soothe Your Smile with Smart Product Choices
Your first line of defense is switching up the products you use every day. Even a temporary change for a few weeks can make a world of difference in your comfort levels.
- Desensitizing Toothpaste: Grab a toothpaste specifically designed for sensitivity. Look for active ingredients like potassium nitrate or stannous fluoride. These work wonders by either blocking the pain signals traveling from your tooth nerve to your brain or by plugging the tiny, exposed tubules in your dentin.
- Alcohol-Free Mouthwash: Many popular mouthwashes contain alcohol, which can be harsh and drying on your newly exposed gums, making sensitivity even worse. An alcohol-free formula is a much gentler choice right now.
This isn't just about feeling better; it's about cleaning effectively. Dental surveys in the UK and Australia have shown that nearly 25% of patients report gum sensitivity for weeks after getting their braces off, which can make them hesitant to brush properly. That's why many orthodontists recommend an antimicrobial mouthwash to reduce oral bacteria by up to 99.9% while things calm down. You can discover more insights about post-braces treatment at oesmiles.com.
Key Takeaway: Think of this as an oral recovery period. Just like you wouldn't jump straight into a marathon after a long break from running, you need to ease your teeth and gums back into their routine. Gentle products are your best friends here.
Adjust Your Diet for Comfort and Protection
What you eat in the first few weeks after debonding plays a massive role in managing sensitivity. Right now, your enamel is a bit more porous and susceptible to everything from temperature shocks to stains.
Give your teeth a well-deserved break by sidestepping foods and drinks that are known triggers.
Foods and Drinks to Limit for a Little While:
- Extreme Temperatures: That piping hot coffee or bowl of ice cream can wait. Stick to lukewarm for now.
- Highly Acidic Foods: Things like citrus fruits, tomatoes, and sodas can feel pretty zesty on sensitive enamel.
- Sugary Treats: Sugar is fuel for plaque-causing bacteria, which can definitely heighten sensitivity.
- Hard or Crunchy Foods: Let your teeth settle before you tackle hard nuts, crunchy chips, or tough bread.
Instead, lean into softer, nutrient-rich foods. Think yogurt, smoothies, soups, and well-cooked pasta. This approach not only keeps you comfortable but also supports healing, making this final leg of your orthodontic journey as smooth as your new smile.
Essential Retainer Care for a Lasting Smile

After all those months (or even years!) of dedication to your orthodontic treatment, you've finally made it. Now, your retainer is your smile's new best friend. It’s the single most important tool you have for protecting the investment you’ve made, ensuring your teeth stay right where we put them.
Without consistent retainer wear, your teeth can start a slow, silent march back toward their old spots. Think of it this way: the ligaments and bone that hold your teeth aren't set in stone just yet. They need time to firm up around this new, perfect alignment. Your retainer is the only thing holding everything in place while that crucial process happens.
Unfortunately, not everyone sticks with it. The American Association of Orthodontists has found that up to 40% of patients don't wear their retainers as prescribed. This often leads to a significant relapse—in fact, up to 90% of those individuals see their teeth shift within the first year. You can discover more research about post-braces relapse rates to see just how common it is.
How to Clean Different Types of Retainers
Wearing your retainer is one thing; keeping it clean is just as vital. A dirty retainer doesn’t just smell and taste bad, it becomes a breeding ground for bacteria that can put your teeth and gums at risk. How you clean it really depends on which type you have.
For Hawley Retainers (Wire and Acrylic)
These are the classic, durable retainers, but plaque loves to build up around the wire and acrylic plate.
- Daily Cleaning: Grab a soft-bristled toothbrush (keep one just for your retainer) and some clear, non-abrasive liquid soap. Gently brush all over the wire and plastic, then give it a good rinse with lukewarm water.
- Avoid Hot Water: Never, ever use hot water. It can warp the acrylic, messing up the fit and making it useless.
For Clear Plastic Retainers (Essix or Vivera)
These nearly invisible retainers, which look a lot like Invisalign aligners, are more delicate. They can stain or warp if you aren't careful.
- Daily Brushing: The moment you take it out, give it a gentle brush with a soft toothbrush and cool water. Steer clear of toothpaste—its abrasive ingredients can create tiny scratches that become perfect hiding spots for bacteria.
- Weekly Soaking: For a deeper clean, use a special retainer cleaning tablet or a simple mix of white vinegar and water. Let it soak for about 15-20 minutes, then rinse it thoroughly.
Expert Tip: Never wrap your retainer in a napkin! I can't tell you how many panicked calls we get about retainers getting accidentally thrown away. Always, always put it back in its protective case the second it comes out of your mouth.
Building a Simple Retainer Cleaning Schedule
Consistency is key. The easiest way to stay on top of it is to make retainer care part of your daily routine. Before you know it, it'll be second nature.
Your Daily Retainer Checklist
- Morning: As soon as you wake up and take your retainer out, rinse it. This simple step prevents saliva and plaque from drying on the surface, which makes it much harder to clean later.
- Brushing: After rinsing, give it a quick but thorough brush with its dedicated toothbrush.
- Evening: Before bed, make sure both your teeth and your retainer are completely clean before popping it in for the night.
This simple habit is a cornerstone of knowing how to clean teeth after braces and will go a long way in keeping that perfect smile for life.
Safely Whitening Your Teeth After Braces
That glorious day is finally here—your braces are off, and you can’t stop running your tongue over your incredibly smooth teeth. It’s a fantastic feeling! But as you admire your brand-new smile in the mirror, you might notice some color inconsistencies. It’s completely normal, and it’s why so many people ask about teeth whitening right after their big reveal.
While whitening is an excellent way to put the finishing touch on your orthodontic journey, jumping the gun can cause problems. Your teeth and gums just went through a lot, and they need a little time to recover. Rushing into a whitening treatment can lead to major sensitivity or even a splotchy, uneven finish. A little patience goes a long way here.
Most orthodontists, myself included, recommend waiting at least one month before considering any whitening. Some even suggest holding off for up to six months. This waiting period is crucial—it allows your saliva to naturally remineralize the enamel that was covered by brackets and gives any gum inflammation from the debonding process time to heal completely.
Why Are My Teeth Discolored After Braces?
Understanding what’s causing the discoloration is the first step toward fixing it. Not all stains are created equal, and what you’re seeing will determine the best course of action.
- Surface Stains: This is the most likely culprit. Think of all the coffee, tea, or colorful foods you’ve had. These can create a yellow or brownish tint that builds up around the edges of the brackets over time. The good news? These are usually the easiest stains to deal with.
- White Spot Lesions: These look like chalky, white spots on the enamel right where your brackets used to be. These aren't stains at all; they're actually an early sign of demineralization, which is the very first stage of a cavity. Traditional whitening won't fix these and can actually make them stand out more.
A Quick Word of Caution: If you notice distinct white spots on your teeth, please don't reach for an at-home whitening kit. It's time for a professional opinion. Schedule a consultation with us at Beyond Dental Care. We can evaluate the spots and recommend treatments like topical fluoride or other therapies to remineralize your enamel before we even think about cosmetic whitening.
Let's Talk About Your Whitening Options
Once your dentist or orthodontist gives you the all-clear, you’ve got several great ways to achieve that uniform, brilliant smile you’ve been waiting for. The right method really depends on your timeline, budget, and how sensitive your teeth are.
It’s no surprise people are eager to start. A recent US survey showed that nearly 30% of adults who had braces got professional in-office whitening within just three months of removal. The top reason? A whopping 7 out of 10 did it because of visible stains. You can discover more about post-braces patient trends from this report.
Here’s a breakdown of your choices.
Post-Braces Whitening Options Compared
Choosing the right whitening method can feel overwhelming, but it doesn't have to be. This table compares some of the most common options to help you decide what might work best for the smile you've worked so hard to achieve.
| Whitening Method | Best For | Average Cost | Safety Considerations |
|---|---|---|---|
| Whitening Toothpaste | Mild, daily surface stain removal and maintenance. | $5 – $20 | Very low risk. Contains gentle abrasives; won't change natural tooth color. |
| Over-the-Counter Strips | Moderate surface stains and 1-2 shades of whitening at home. | $20 – $60 | Can cause gum irritation and tooth sensitivity if not used correctly. |
| Custom Take-Home Trays | Deeper stains and more significant whitening with professional oversight. | $250 – $500 | Custom fit minimizes gum contact and irritation. Stronger gel than OTC options. |
| In-Office Whitening | Fastest, most dramatic results for deep-set stains under professional supervision. | $500 – $1,000+ | Highest peroxide concentration. Gums are protected, but temporary sensitivity is common. |
Ultimately, the best path forward depends on your unique situation. A professional consultation ensures you're choosing a safe, effective treatment that protects your investment in your new smile.
A Closer Look at Whitening Treatments
At-Home Whitening Choices
- Whitening Toothpastes: This is a great, gentle starting point. These toothpastes have mild abrasives that scrub away fresh surface stains, but they won’t actually change the natural, underlying shade of your teeth.
- Whitening Strips or Gels: You can find these at any drugstore. They use a peroxide-based gel to bleach the tooth enamel. They're definitely a step up from toothpaste but can sometimes lead to sensitivity if your gums are still a bit tender.
Professional Whitening Treatments
- In-Office Whitening: This is the fastest and most powerful option. Here at Beyond Dental Care, a dentist applies a high-concentration whitening agent that’s often activated with a special light. We take care to protect your gums and monitor the whole process to make sure you get safe, even, and brilliant results.
- Custom Take-Home Trays: This is a fantastic middle-ground. We’ll take an impression of your teeth to create perfectly fitted trays. You’ll get a professional-grade whitening gel to use with the trays at home. This approach delivers much better results than over-the-counter kits with a far lower risk of gum irritation.
The road to a brighter smile after braces starts with a bit of patience and a chat with your dental team. Taking that extra step ensures you not only get a beautiful outcome but also protect the long-term health of the smile you worked so hard for.
Common Questions After Your Braces Come Off
Getting your braces off is a huge milestone, but it's also the start of a new chapter in your orthodontic journey. It's completely normal to have a bunch of questions now that you're in the maintenance phase. We hear these all the time, so let's tackle the most common concerns to help you protect that brand-new smile with confidence.
How Long Will My Teeth and Gums Be Sensitive?
It's almost a guarantee you'll feel some sensitivity in your teeth and gums for a little while. This can last anywhere from a few days to a couple of weeks after your removal appointment. Think about it: your teeth have been under constant pressure for years, and now they're free! That adjustment period, plus the slight gum inflammation from the debonding process, is what you're feeling.
To keep comfortable, switch to a soft-bristled toothbrush and find a toothpaste made for sensitive teeth. It's also a good idea to steer clear of anything super hot, icy cold, or really acidic for a bit. If the sensitivity feels intense or just won't go away after a month, give your orthodontist or dentist a call to get it checked out.
When Can I Eat Hard or Sticky Foods Again?
We know you've been dreaming of that first bite of something crunchy or chewy. The temptation is real! But it's smart to hold off for at least a week or two.
Your teeth are still settling into their final positions, and the ligaments that hold them need a little time to firm up.
A Word of Caution: Your enamel can also be a bit more vulnerable right after your braces are removed. Ease back into it. Try reintroducing firmer foods like raw apples or crusty bread gradually. And continue to be careful with things that are extremely hard (like jawbreakers) or super sticky (like taffy), as they can damage both your teeth and your new retainer.
What Should I Do If My Teeth Are Shifting?
Seeing your teeth move even a tiny bit after all that work can be pretty alarming. A minuscule amount of settling in the first few days is normal, but any noticeable shift is your cue to call the orthodontist. Don't wait.
Nine times out of ten, this comes down to your retainer. The most common culprits are:
- Not wearing your retainer as directed: Be honest with yourself. Are you following your orthodontist's instructions for the exact number of hours each day?
- A poor fit: If your retainer feels loose or just doesn't seem to click into place correctly, it can't do its job.
Don't fall into the "I'll wait and see" trap if you notice movement. A quick trip to your orthodontist can usually solve the problem with a simple retainer adjustment. Acting fast is the key to preventing a major relapse and avoiding more ortho treatment down the road.
How Often Do I Need a Professional Cleaning After Braces?
Once you've had that first, crucial professional cleaning right after your braces come off, you should slide back into a regular schedule of dental cleanings every six months. This is a non-negotiable part of keeping your teeth clean and healthy long-term.
In some situations, your orthodontist might even suggest a follow-up cleaning after just three months. This is to make sure any sneaky plaque or tartar that was hiding around your brackets is completely gone. Sticking to a consistent professional cleaning schedule is absolutely essential for maintaining the health and brilliance of your new smile and for spotting any potential problems before they get serious.
At Beyond Dental Care, we know the journey to a perfect smile doesn't stop when the braces are removed. Our team is here to provide the ongoing support and professional care you need to protect your investment for years to come. Whether you have questions about your retainer, whitening options, or routine cleanings, we're here to help you keep your beautiful results for life. Schedule your post-orthodontic consultation with us today at beyonddentalcare.com.